k3d
Octodraw User Manual
This manual covers installation, navigation, selection, tools, panels, and workflows for Octodraw.
Installation and launch
Windows (ZIP / MSI / MSIX)
- ZIP: unzip the distribution archive.
- MSI/MSIX: install the package from the release artifacts.
- Run
octodraw-jre.cmdto use the bundled runtime, oroctodraw.cmdto use a system Java. - Optional (ZIP only): run
octodraw.install.cmdto add Octodraw to PATH and register.octdfiles.
Linux (TAR.GZ recommended)
- Extract the
.tar.gzdistribution archive (preferred, preserves executable flags). - If you used a ZIP, make the launcher executable:
chmod +x octodraw-jre octodraw-editor. - Run
./octodraw-jrefor the bundled runtime, or./octodraw-editorfor system Java.
macOS (TAR.GZ recommended)
- Extract the
.tar.gzdistribution archive (preferred, preserves executable flags). - If you used a ZIP, make the launcher executable:
chmod +x octodraw-jre octodraw-editor. - Run
./octodraw-jrefor the bundled runtime, or./octodraw-editorfor system Java.
Launch commands
The desktop launcher supports commands and flags:
edit --file <path> [--size WIDTHxHEIGHT]   Open or create a model file
edit --plugins-dir <path>                 Override plugins folder
groovy <script>                           Run a Groovy script file
version                                  Show version information
update                                   Download and replace the editor jar
help                                     Show help
You can also pass a .octd path directly (the launcher converts it into --file).
Plugins location
- Default plugin folder:
plugins/next to the application. - Override the location with:
--plugins-dir /path/to/plugins.
Files and autosave
- Default model file:
octodraw.octdin the current working folder. - Open a specific file with:
--file /path/to/model.octd. - Octodraw autosaves whenever geometry or settings change.
- Model files store: geometry, objects, camera, lighting, shadow settings, units, snap radius, and grid spacing.
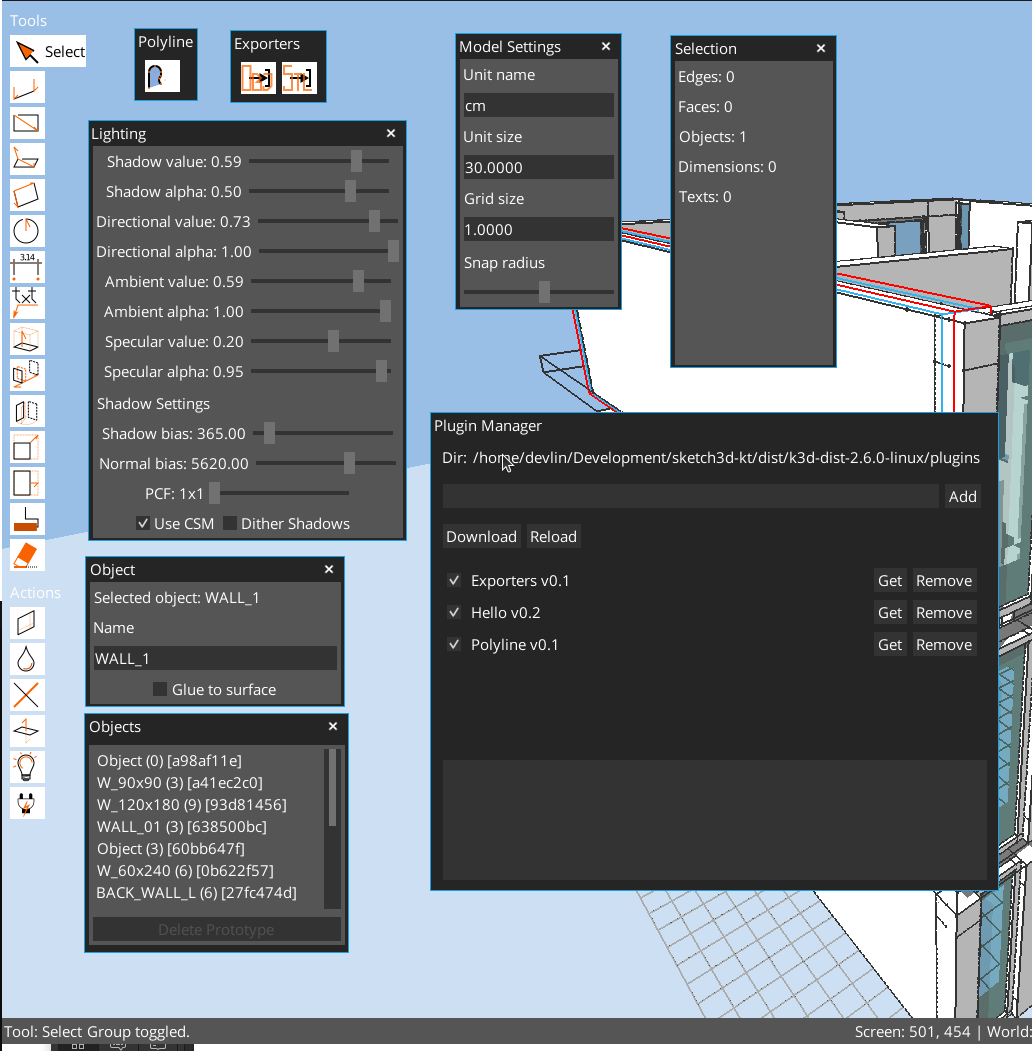
UI overview
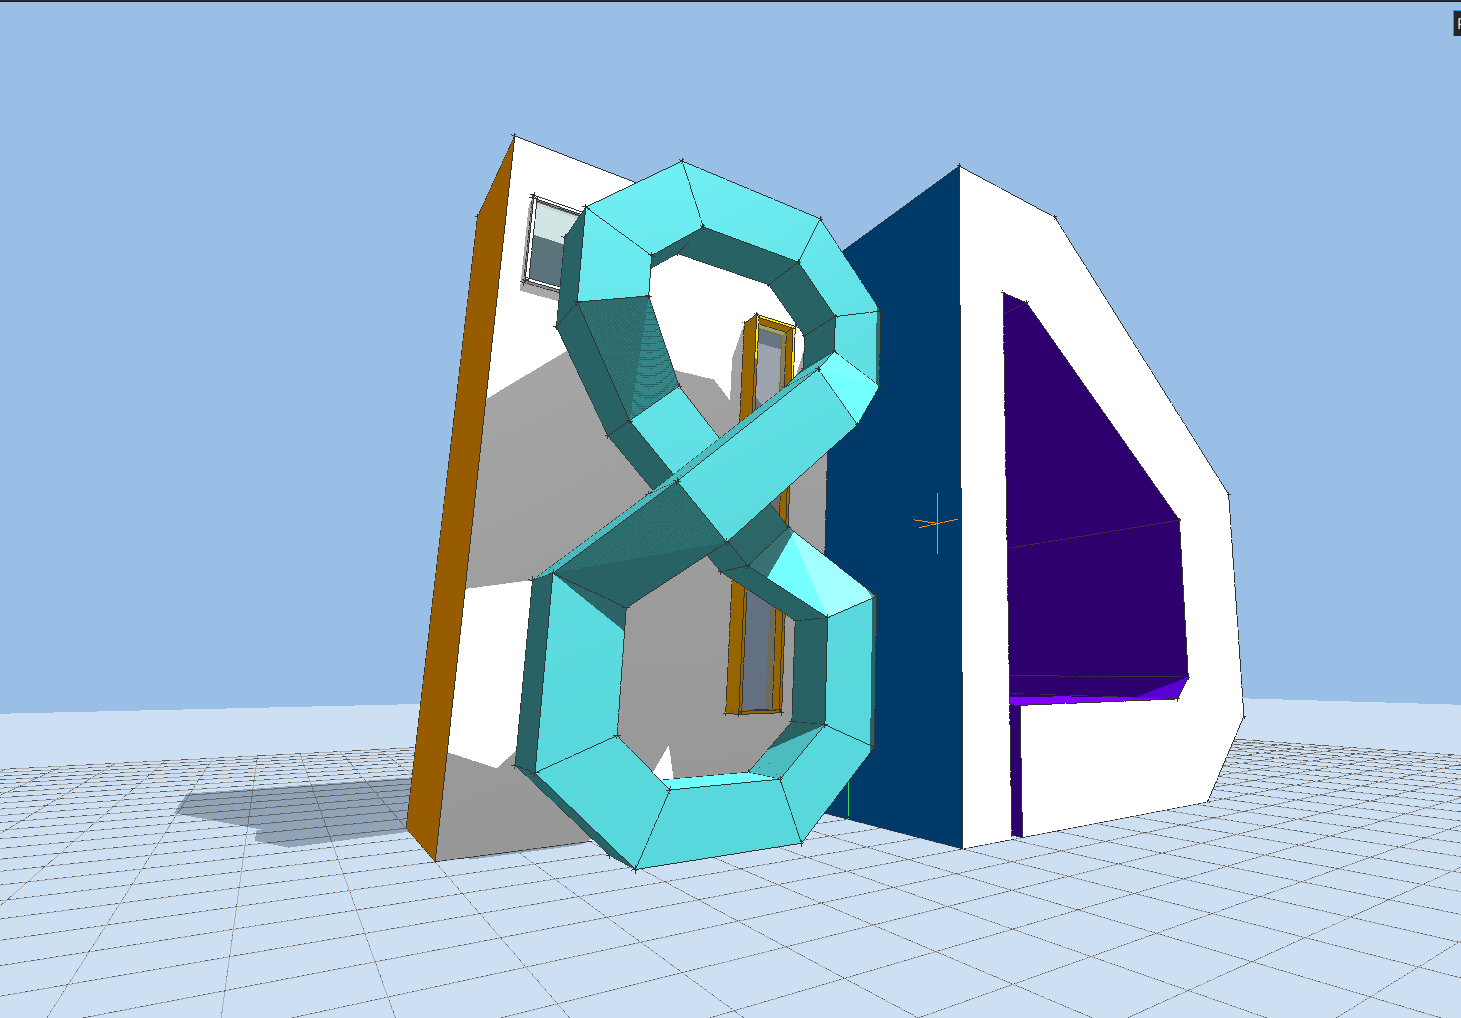
- Viewport: the 3D drawing surface.
- Floating toolbars: Construction, Modification, Architecture, Voxel, and Actions.
- Toolbars are movable, stay top-aligned by default, and wrap to the next row when the window is too narrow.
- Tool buttons are icon-only; hold hover briefly to see the popover label.
- Right panels: selection, object info, objects list, model settings, polyline settings, architecture settings, lighting, plugins.
- Status bar: current tool, status message, snap info, cursor, and numeric input.
- Command palette: search and run tools and commands (
Ctrl+Shift+P). - Undo/Redo:
Ctrl+Z/Ctrl+Y(orCtrl+Shift+Z).
Panels are collapsible: double-click a panel title bar to toggle its content. Collapse/expand keeps the title bar anchored in place. Keyboard focus is panel-aware: typing in focused fields stays in UI controls, while viewport shortcuts apply when the cursor is over the canvas.

Architecture tools brief
- Architecture elements are parametric objects stored in architecture groups.
- Main tools:
Wall,Slab,Stair,Add Hole,Window Frame,Door Frame. - Architecture defaults and selected-element parameters are edited in the Architecture Settings panel.
- You can edit architecture element parameters by selecting the element/group; entering group edit mode is not required for parameter updates.
- Wall and stair generation are contour/path driven, with automatic rebuild after parameter changes.
Navigation (camera)
- Orbit: right mouse drag.
- Pan: Shift + right mouse drag.
- Zoom: mouse wheel (moves the camera along the view direction).
- Camera target: shown as an orange cross in the scene.
Selection
- Click to select edges, faces, objects, dimensions, and texts.
- Shift-click: add to selection.
- Ctrl-click: remove from selection.
- Double-click an object: enter object edit mode.
- Double-click a face: select coplanar faces.
- Triple-click a face or edge: select connected geometry.
Window selection
- Drag left-to-right: select items fully inside the window.
- Drag right-to-left (dashed outline): select intersecting items.
- Hold
Altwhile starting selection to force 2D window selection and skip direct picking.
Volume selection
- Click empty space once to set a first corner.
- Click a second point to select everything inside that 3D volume.
Selection in voxel groups
- In a voxel group, selection targets voxels directly (not generated faces/edges).
- Click toggles voxel selection; Shift/Ctrl and window/volume selection still apply.
Deleteremoves selected voxels.- Move/Copy works on selected voxels using integer voxel offsets in local voxel space.

Snapping and guides
Octodraw snaps to multiple inference targets for precision:
- Grid intersections and grid lines.
- Line endpoints and midpoints.
- Points along line segments.
- Faces and ground plane intersections.
- Grid guides and axis guides.
Guides help establish temporary reference planes or axes:
G: create a grid guide at the current snap point.T: create an axis guide at the current snap point.Esc(Select tool): clear all guides.
Snap radius and grid spacing are configurable in Model Settings.

Numeric input
- While a tool is active, typing a number updates the current measurement.
Backspaceclears the input buffer;Entercommits it.Ctrl+Nopens a numeric input popup at the cursor.- Expressions using
+ - * /are supported (example:12.5/2).

Objects (groups and prototypes)
Objects let you reuse geometry and isolate edits.
- Create an object prototype from selection:
Ctrl+GorCtrl+O. - The selection is replaced by a new instance.
- Objects panel lists prototypes and instance counts.
- Double-click a prototype in the list to place a new instance.
- Delete a prototype only when it has no instances.
- Renaming a selected object updates the prototype name.
- Double-click an instance to edit the prototype (changes apply to all instances).
- Glue to surface keeps objects aligned to a picked surface during moves.

Hotspots and visual programming (dynamic objects)
Hotspots are parametric control handles used inside object prototypes and on object instances.
- A prototype defines geometry + hotspots + hotspot bindings.
- Each instance stores its own hotspot positions.
- Instance geometry is recomputed from the prototype baseline using per-instance hotspot values.
Core workflow
- Enter object edit mode (double-click an instance).
- Use the Hotspot action button, then click in the viewport to place a hotspot.
- In Hotspot Settings, choose:
- name,
- operation,
- shape,
- color.
- Select geometry and click Attach Selection to bind it to the selected hotspot.
- (Optional) Select multiple hotspots, then click Attach Selection on one hotspot to bind hotspot-to-hotspot dependencies.
- (Optional) Click Pick Reference for operations that need a center/reference.
- Exit object edit mode, then drag hotspot handles on instances to drive per-instance deformation.
Hotspot operations
MOVE: translate attached geometry.STRETCH: stretch attached geometry with vertex-aware behavior.SCALE: scale around reference (or origin when no reference is set).ROTATE: rotate around reference.MULTIPLY_LINEAR: replicate attached geometry along hotspot span.MULTIPLY_VOLUMETRIC: replicate attached geometry in a filled extent volume.MULTIPLY_ROTATE_2D: replicate along an arc around reference.MULTIPLY_ROTATE_3D: replicate along a spiral-like path around reference with height progression.
Hotspot shapes and colors
Available shapes:
- triangle up,
- square,
- circle,
- diamond,
- triangle down.
You can set shape/color globally as defaults (no hotspot selected) or per selected hotspot.
Notes
- Multiply operations generate derived instance geometry at runtime from bindings.
- For predictable results, bind explicit geometry (edges/faces) before using multiply operations.
- Hotspot binding state is saved with the model and restored on reopen.
Tools
Select
- Default tool for selection and multi-select.
- Input: left-click for single select; drag for window/crossing selection; click empty space twice for volume selection.
- Modifiers: Shift adds, Ctrl removes, Alt forces 2D window select; Esc clears guides and selection.
Line
- Click to start a line chain; each click adds another segment.
- Line tool creates edges only and does not auto-create faces.
Enterfinishes the current chain and keeps the tool active.Escexits to Select.- Input: left-click to place each segment endpoint.
- Modifiers: numeric input allowed for segment length.
Construction Line
- Draws one segment per two clicks and does not auto-chain to the next segment.
- Tool stays active after each segment so you can place independent construction lines quickly.
Enterclears an in-progress segment.Escexits to Select.- Input: left-click start, left-click end.
Voxel
- Places one voxel per click on ground/surface context.
- If no voxel group is active, Octodraw auto-creates one and enters voxel edit mode.
- New voxels use the voxel group color.
Escexits to Select.- Input: left-click to place.
Voxel Volume
- Fills a rectangular 3D volume of voxels from two opposite corners.
- First click sets corner A, second click sets corner B and commits.
- If no voxel group is active, Octodraw auto-creates one and enters voxel edit mode.
Enterclears the current draft;Escexits to Select.- Input: left-click corner A, left-click corner B.
Voxel Frame
- Same two-corner workflow as Voxel Volume, but creates only boundary edge voxels of the box.
- If no voxel group is active, Octodraw auto-creates one and enters voxel edit mode.
Enterclears the current draft;Escexits to Select.- Input: left-click corner A, left-click corner B.
Wall
- Adds architecture wall segments (thickness, height, inclination from Architecture Settings).
- First click sets segment start, second click sets end and creates one wall segment.
- Tool chains by default: each next click continues from the previous endpoint.
- If no architecture group is active, Octodraw auto-creates one and enters architecture edit mode.
Enterfinishes the current chain;Escexits to Select.
Slab
- Creates a rectangular slab from two opposite corners.
- Slab thickness comes from Architecture Settings.
- If no architecture group is active, Octodraw auto-creates one and enters architecture edit mode.
Enterclears the current draft;Escexits to Select.
Stair
- Builds a stair object in four picks:
- first contour corner,
- opposite contour corner,
- walking line start,
- walking line end (commit).
- Stair height, step count, and support thickness come from Architecture Settings.
- If no architecture group is active, Octodraw auto-creates one and enters architecture edit mode.
Enterresets the current draft;Escexits to Select.
Add Hole
- Cuts a rectangular hole in the nearest compatible wall from two opposite corners.
- Hole selection/deletion workflow:
- selecting and deleting a hole contour removes the hole definition from the wall;
- deleting generic generated wall faces/edges is blocked to preserve parametric architecture integrity.
- If no architecture group is active, Octodraw auto-creates one and enters architecture edit mode.
Enterclears the current draft;Escexits to Select.
Window Frame
- Creates a rectangular window frame from two opposite corners.
- Frame depth and width come from Architecture Settings.
- If no architecture group is active, Octodraw auto-creates one and enters architecture edit mode.
Enterclears the current draft;Escexits to Select.
Door Frame
- Creates a rectangular door frame from two opposite corners.
- Frame depth and width come from Architecture Settings.
- If no architecture group is active, Octodraw auto-creates one and enters architecture edit mode.
Enterclears the current draft;Escexits to Select.
Rectangle
- Click to set a corner; click to finish the rectangle.
- Creates edges and a face on the best-fit plane.
- Input: left-click two corners.
- Modifiers: numeric input allowed for side length.
Surface Rectangle
- Click a surface to set plane and origin; click to finish the rectangle.
- Creates edges and a face aligned to the picked surface.
- Input: left-click on a face, then left-click to set size.
Quad
- Click four corners to create a quadrilateral face.
- Input: four left-clicks to define corners.
Circle
- Click center, then click radius to create a circular face.
- Input: left-click center, left-click radius.
Linear Dimension
- Click first measure point.
- Click second measure point.
- Click a third point to position the dimension line.
- The displayed value uses the current model unit.
- Input: three left-clicks (start, end, placement).
- Modifiers: numeric input can override the measured distance.
Text
- Click to place text at the cursor plane.
- Edit content, size, and screen/model mode in the Selection panel.
- Input: left-click to place.
- Modifiers: edit text, size, and screen/model toggle in Selection panel.
Push/Pull
- Click a face to start; click again to set the extrusion distance.
- Input: left-click face, left-click to confirm distance.
- Modifiers: numeric input overrides distance.
Move
- Click a reference point, then click a destination.
Ctrltoggles copy mode (if enabled, copies instead of moving).- In voxel groups, selected voxels move/copy on integer voxel offsets.
- Input: left-click start, left-click end.
- Modifiers: Ctrl toggles copy mode; numeric input overrides distance.
Rotate
- Click to set a pivot; click again to set the rotation.
Ctrltoggles copy mode (if enabled, duplicates before rotating).- Input: left-click pivot, left-click to set angle.
- Modifiers: Ctrl toggles copy mode; numeric input overrides angle.
Scale
- Click to set a pivot; click again to set the scale.
Ctrltoggles copy mode (if enabled, duplicates before scaling).- If the reference direction is axis-aligned (
X,Y, orZ), scaling is constrained to that single axis (squash/stretch). - Otherwise scaling uses the existing plane/uniform constrained behavior.
- Input: left-click pivot, left-click to set scale.
- Modifiers: Ctrl toggles copy mode; numeric input overrides factor.
Stretch
- Move only the selected vertices or faces while preserving unselected geometry.
- Input: left-click reference, left-click destination.
- Modifiers: numeric input overrides distance.
Paint
- Click a face to apply the active color.
- Use the Color action button to pick the active color.
- In voxel groups:
- if voxels are selected, Paint recolors only selected voxels;
- if no voxels are selected, Paint applies the color to the whole voxel model.
- Input: left-click face to paint.
Object
- Places object prototypes into the scene after choosing one in the Objects panel.
- Input: left-click to place the selected prototype instance.

Architecture tools (detailed, tool by tool)
Architecture workflow context
- Architecture tools operate on architecture groups.
- If a required architecture group is missing, creation tools can auto-create one and continue.
- The Architecture Settings panel shows either default construction values (no architecture element selected) or selected-element values (when exactly one architecture element is selected).
- Parameter changes trigger a live rebuild of the selected architecture element.
Wall tool
- Purpose: create multi-segment walls using chained picks.
- Input flow:
- click first wall point,
- click end point to create one segment,
- continue clicking to chain additional segments.
Enter: finish current chain and keep Wall tool active.Esc: cancel and return to Select.- Driven by panel parameters:
- wall thickness,
- wall height,
- wall inclination,
- exterior/interior colors.
- Wall joins are rebuilt in 3D when neighboring segments meet.
Slab tool
- Purpose: create rectangular slab geometry from two corners.
- Input flow:
- click first slab corner,
- click opposite corner to commit.
Enter: clear current draft.Esc: cancel and return to Select.- Driven by panel parameters:
- slab thickness,
- slab top/bottom/side colors.
Stair tool
- Purpose: create ribbon-style stairs from a contour and a tread path.
- Input flow:
- pick a closed contour polyline (preferred: whole polyline/group pick),
- pick an open tread-line polyline.
- The generator divides the tread path by step count, builds per-step orientation from each local segment, trims each step to contour intersections, and builds tread/support geometry.
- If side cross-lines meet before contour intersection, the step section collapses to a triangle automatically.
- Support and backface are generated as a continuous ribbon with special handling at the first/last steps.
- Rail grid options:
- left and right rails can be toggled independently in Architecture Settings,
- rails are generated at +1, +2, +3, +4 model units above each step top edge.
- Driven by panel parameters:
- stair height,
- stair steps,
- support thickness,
- left/right rail enable,
- tread/support colors.
Add Hole tool
- Purpose: cut rectangular holes in compatible walls.
- Input flow:
- click first corner on/near wall face,
- click opposite corner to commit.
- If a wall is selected, hole is added to that wall; otherwise nearest compatible wall is used.
- Tool is restricted to wall-only architecture groups.
Enter: clear current draft.Esc: cancel and return to Select.
Window Frame tool
- Purpose: create a parametric rectangular window frame.
- Input flow:
- click first frame corner,
- click opposite corner to commit.
- Frame is built on the picked construction plane.
- Driven by panel parameters:
- frame depth,
- frame width,
- frame color.
Enter: clear current draft.Esc: cancel and return to Select.
Door Frame tool
- Purpose: create a parametric rectangular door frame.
- Input flow:
- click first frame corner,
- click opposite corner to commit.
- Frame is built on the picked construction plane.
- Uses the same frame parameters as Window Frame:
- frame depth,
- frame width,
- frame color.
Enter: clear current draft.Esc: cancel and return to Select.
Editing architecture elements
- Select an architecture element/group, then adjust parameters in Architecture Settings.
- Walls/slabs/stairs/frames update in place when values change.
- For stairs, rail toggles and colors are also editable post-creation.
Actions and panels
Actions (toolbar)
- Cleanup: split intersections and re-weld edges.
- Delete: delete current selection.
- Flip Faces: reverse the orientation of selected faces.
- Color: open the paint color picker.
- Hotspot: start hotspot placement (click in viewport to place).
- Voxelize Faces: convert selected mesh faces into voxels.
- Works from any mesh context.
- If no voxel group is active, Octodraw creates one and enters it.
- Generated voxels use the target voxel-group color.
- Lighting: toggle the Lighting panel.
- Plugin Manager: open the Plugin Manager panel.
Shortcut notes:
Ctrl+Lruns Cleanup;Deleteremoves selection; flip/color/voxelize are toolbar/command-palette actions.
Selection panel
- Counts for edges, faces, voxels, hotspots, objects, dimensions, and texts.
- Text fields to edit text content and size.
- Toggle for screen-aligned vs model-aligned text. Input: click fields to edit; checkbox toggles screen-aligned text.
Object Info panel
- Shows selected object name and edit state.
- Rename objects and toggle Glue to surface. Input: click name field to edit; checkbox toggles glue.
Objects panel
- Lists object prototypes and instance counts.
- Double-click a prototype to place an instance.
- Delete a prototype only when it has no instances. Input: double-click to place; Delete Prototype button removes selection (when allowed).
Model Settings panel
- Unit name and unit size for measurements.
- Grid size (spacing).
- Snap radius (snap tolerance). Input: type values in fields; drag Snap radius slider.
Hotspot Settings panel
- Shows either:
- default hotspot settings (when no hotspot is selected), or
- selected hotspot settings.
- Controls:
- hotspot name,
- operation,
- shape,
- color (text field + picker),
- attached geometry counters,
- reference state.
- Actions:
- Attach Selection
- Select Attached
- Pick Reference
- Clear Reference
- Add At Cursor
- Delete Selected
Lighting panel
- Directional, ambient, specular, and shadow controls.
- Shadow bias, normal bias, PCF mode, dithering, and cascades toggle. Input: drag sliders and toggles for live updates.
Plugin Manager panel
- Add plugin URLs or local paths.
- Download, enable/disable, and reload plugins.
- View load errors in the panel log. Input: type a URL/path, click Add; use Download/Reload buttons and enable checkboxes.

Command palette
Open with Ctrl+Shift+P and search for tools, panels, and view commands. The palette also exposes plugin commands when available.
Input: type to filter, Enter to run the highlighted command.
Useful voxel commands:
Edit> New Voxel Group: create a voxel group and enter edit mode.Edit> Voxelize Faces: voxelize selected faces into a voxel group.
Built-in console (dev)
Octodraw includes a persistent Groovy console for power users. Start it using the launcher command:
edit --file path/to/model.octd
In the console:
- Type
:helpfor meta commands. - Type
:examplesfor snippets. - Use
app.run { ... }to mutate the model safely. Input: Enter submits when syntax is complete; Up/Down navigates history if the buffer is empty; Ctrl+Up/Down always navigates history.
Common meta commands:
:help/:examples:exitto quit the app:historyto list prior commands:perfto show memory, disk, threads, and CPU stats:objectsto list top-level objects:listto inspect bound variables:line,:poly,:circleto draw geometry
Useful bindings:
app,scene,selection,consolepluginHost,lighting,shadow,lightingCtlcamera,cameraTarget,cameraCtlstatus,unit,save,version

Plugins
Octodraw loads Groovy plugins from the plugins folder at startup and via the Plugin Manager.
- Use the Plugin Manager to add, download, enable/disable, and reload plugins.
- Plugin tools appear in the toolbar and command palette.
- For development details, see
PLUGIN_DEVELOPMENT.md.
Voxel workflow (recommended)
- Start from mesh geometry or an empty file.
- Create a voxel group (
Edit> New Voxel Group) or just start with a voxel tool (auto-creates group). - Build with:
Voxelfor single blocks,Voxel Volumefor solid box fills,Voxel Framefor box edge structures.
- Refine with Select + Move/Copy + Paint at voxel level.
- Convert mesh patches with Voxelize Faces when needed.
- When ready for classic mesh editing, select voxel group(s) and ungroup (
Ctrl+Shift+G) to explode into static faces/lines.
Tips and troubleshooting
- If a panel field is focused, move the cursor over the viewport to apply canvas shortcuts (
Esc,Delete, tool keys). - If snapping is too aggressive, reduce Snap radius in Model Settings.
- If guides clutter the view, press
Escin Select mode to clear them. - If a plugin fails to load, open Plugin Manager and read the error log.
For keyboard shortcuts, see SHORTCUTS.md.